Components
Contents
Components#
The rover has two levels. The bottom level is the diy-assembly tank chassis. The top level is a wooden frame to hold the power components.
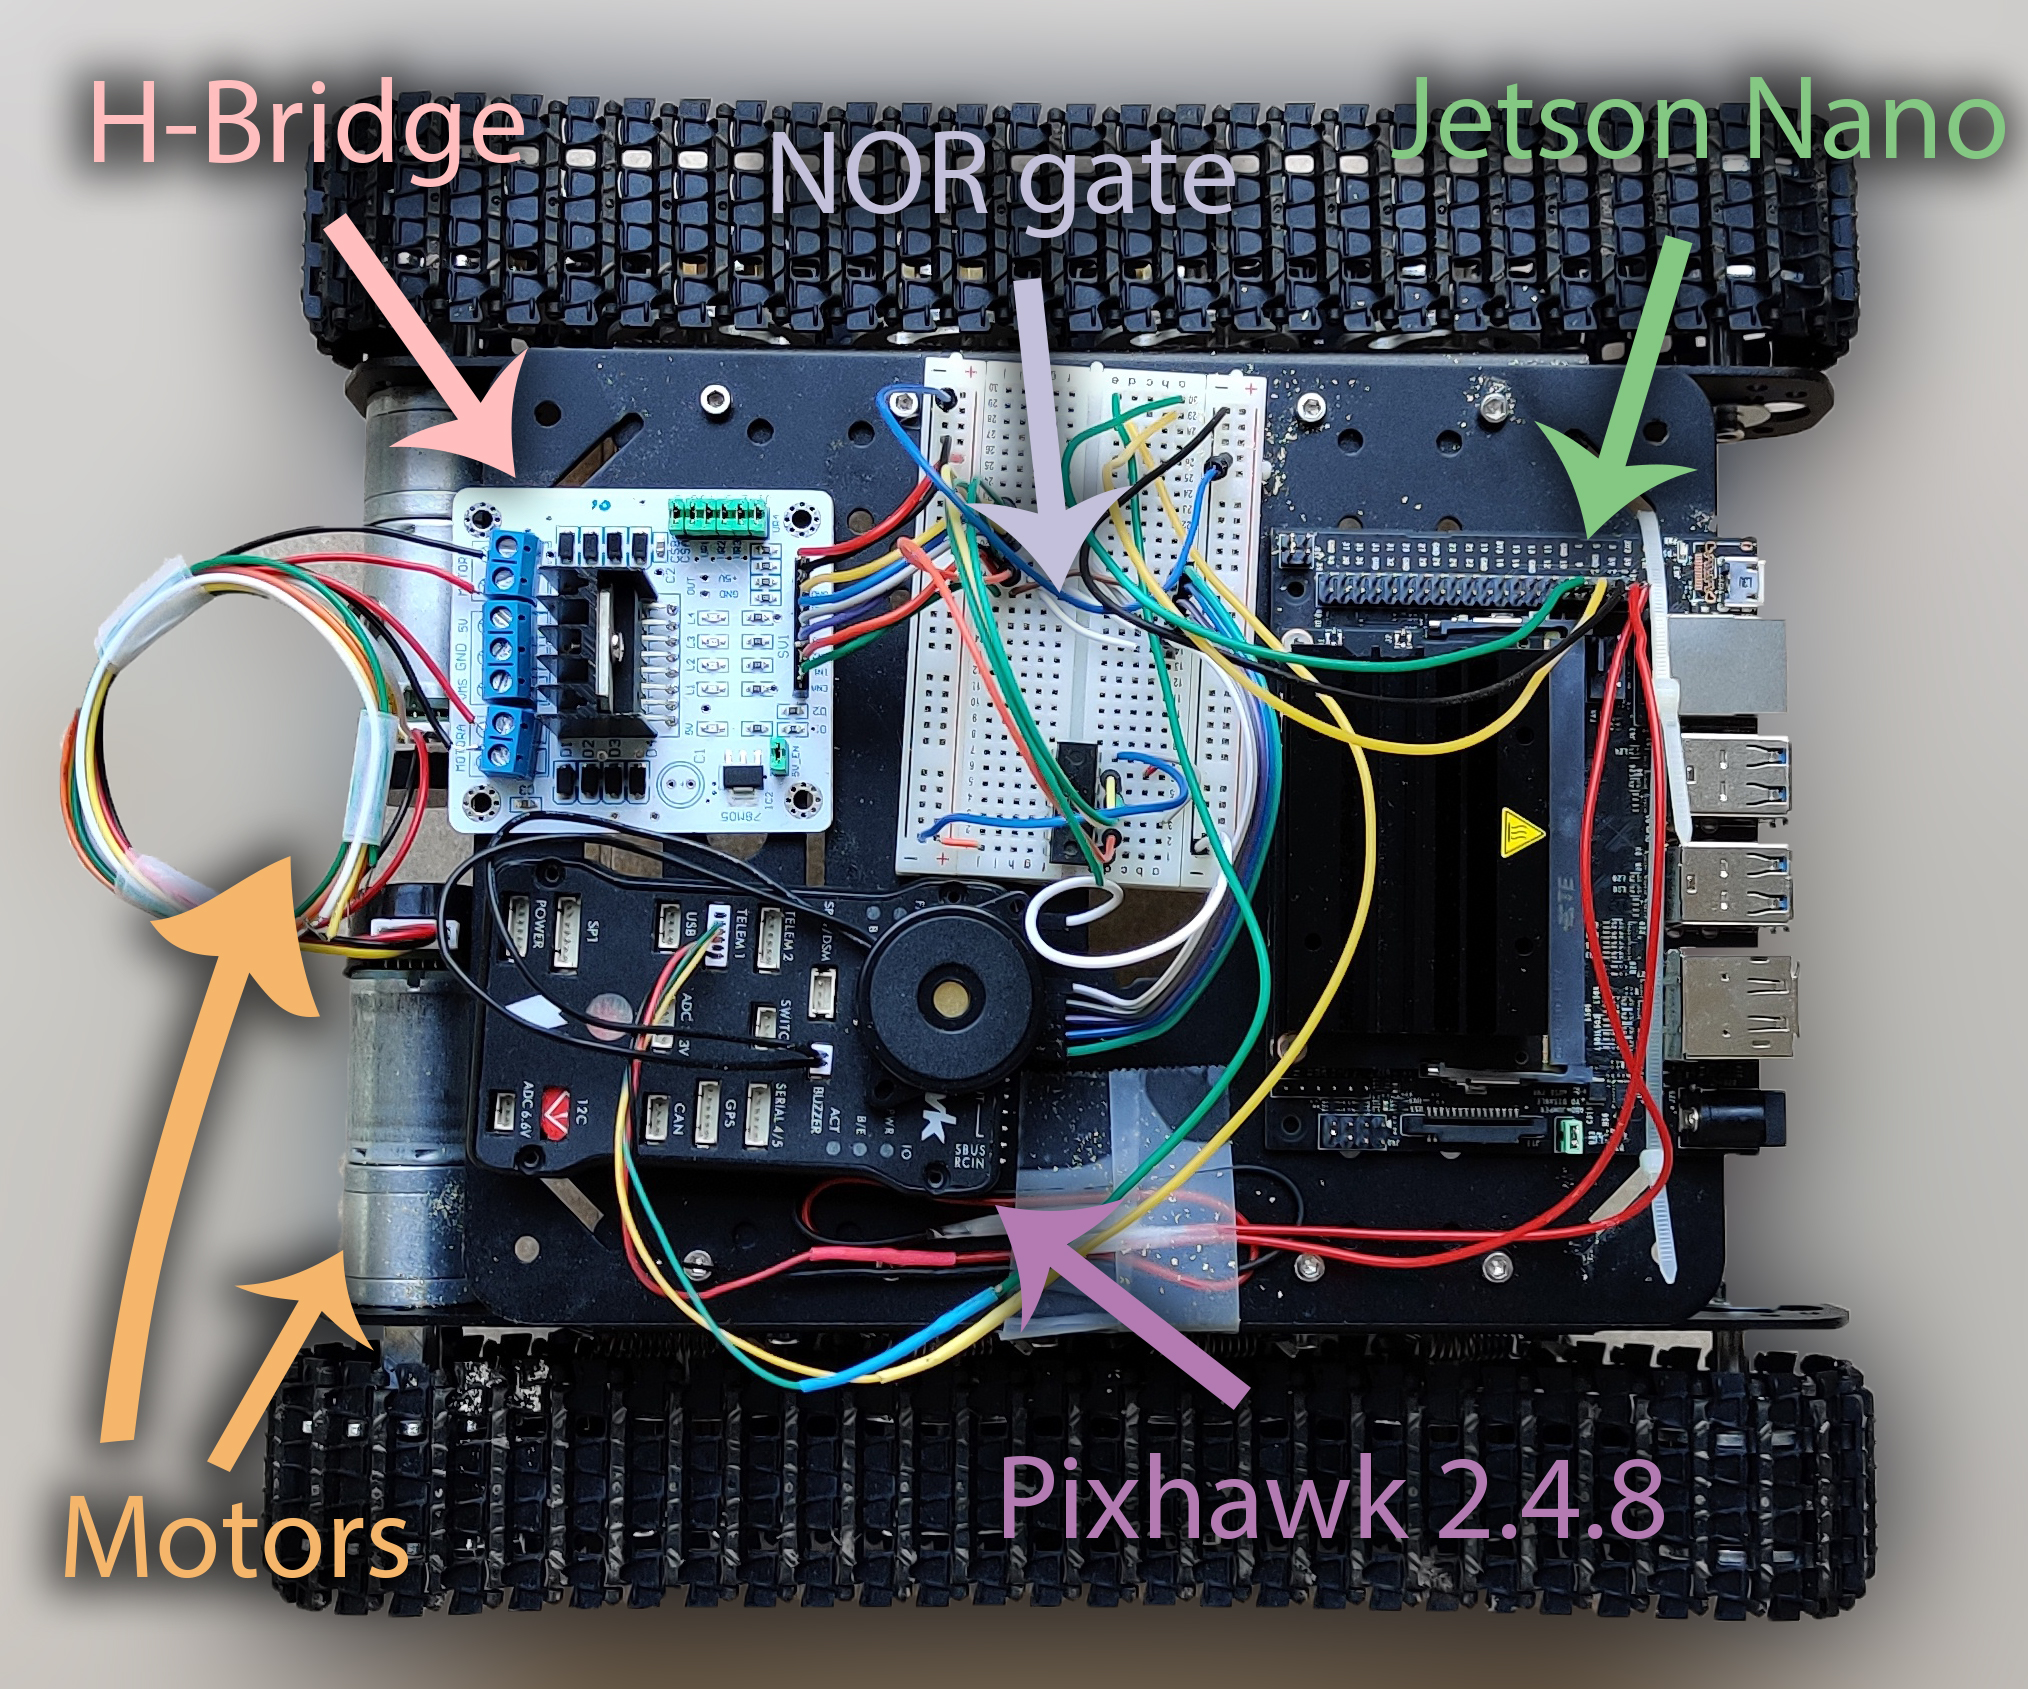
Fig. 10 Rover bottom level#
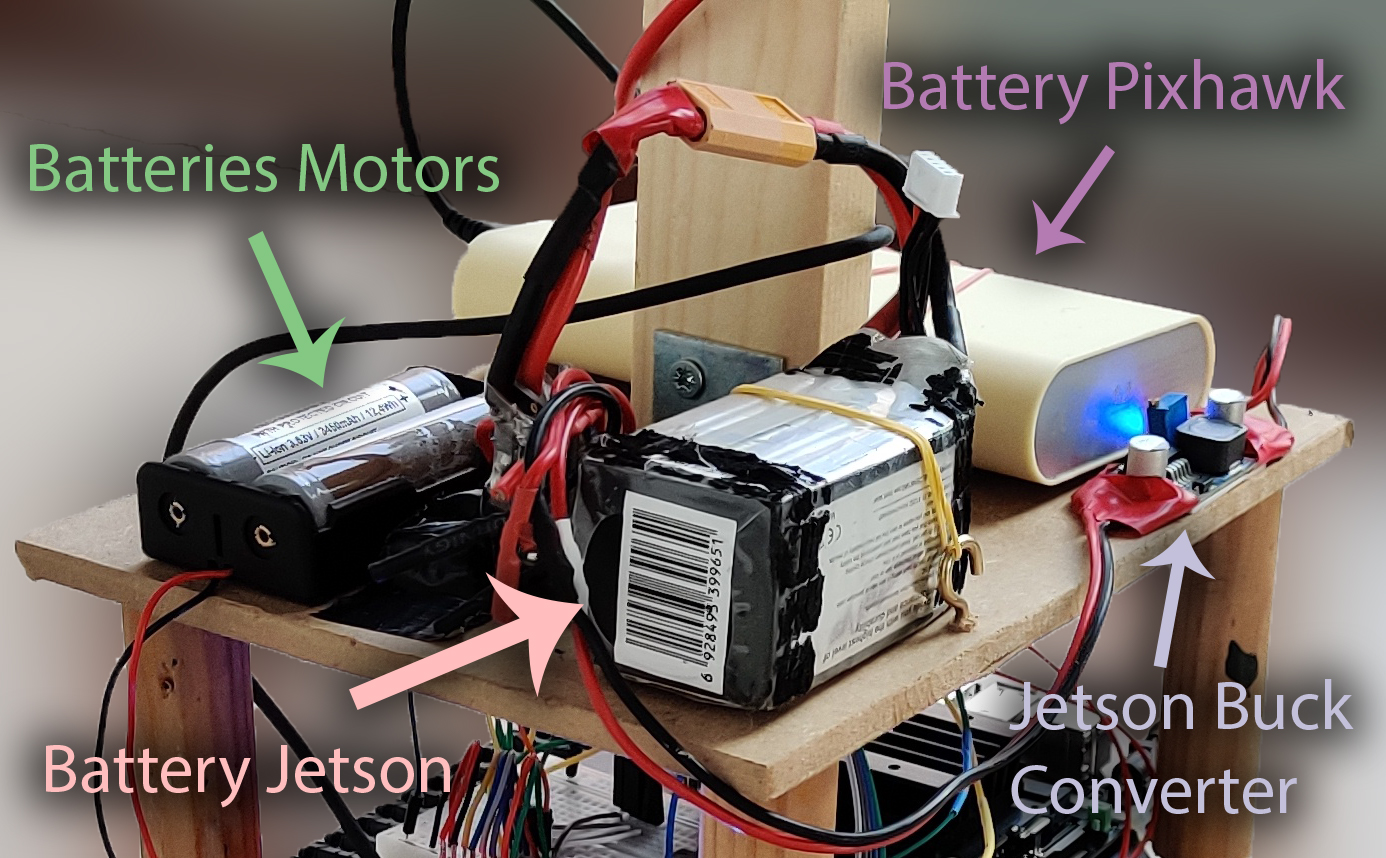
Fig. 11 Rover top level#
Chassis#
The base of the rover is the “TS100 Shock Absorber Tank Chassis” by DOIT (manual). The kit for this rover was kindly provided to us by our mentor at Airobot.
The chassis uses simple DC motors with a Hall-effect sensor. It is possible to use these sensors with Ardupilot for better positional accuracy, but we didn’t in our setup. The motors are rated for a max of 9V.
H-bridge#
To control the speed and direction of the two motors we used a VMA409 H-bridge breakout board, also provided to us by Airobot.
To ease control of the H-bridge through software we added a simple NOR-gate circuit.

Fig. 12 Circuit to control the H-bridge from the Pixhawk#
Flight controller#
To control the rover’s motors (and potentially other RC components) we used a Pixhawk 2.4.8 flight controller.
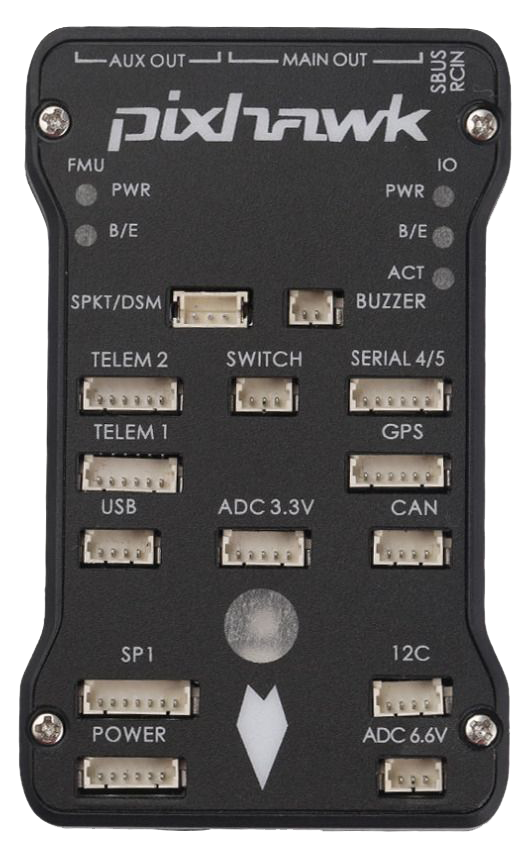
Fig. 13 Pixhawk flight controller#
To control the speed of the motors the H-bridge’s motor PWN connections (labelled “ENA” and “ENB” on the VMA409) should be connected to the Pixhawk’s SERVO1 and SERVO2 pins (mainout rail).
The Pixhawk’s Relay 1 and Relay 2 pins control the motors’ direction. See the circuit diagram above for the necessary connections.
See Ardupilot Configuration for all the necessary ardupilot parameter tweaks.
SBC#
As previously discussed we used an NVIDIA Jetson Nano SBC to make autonomous steering decisions. The software logic for this is discussed in the chapter about ROS.
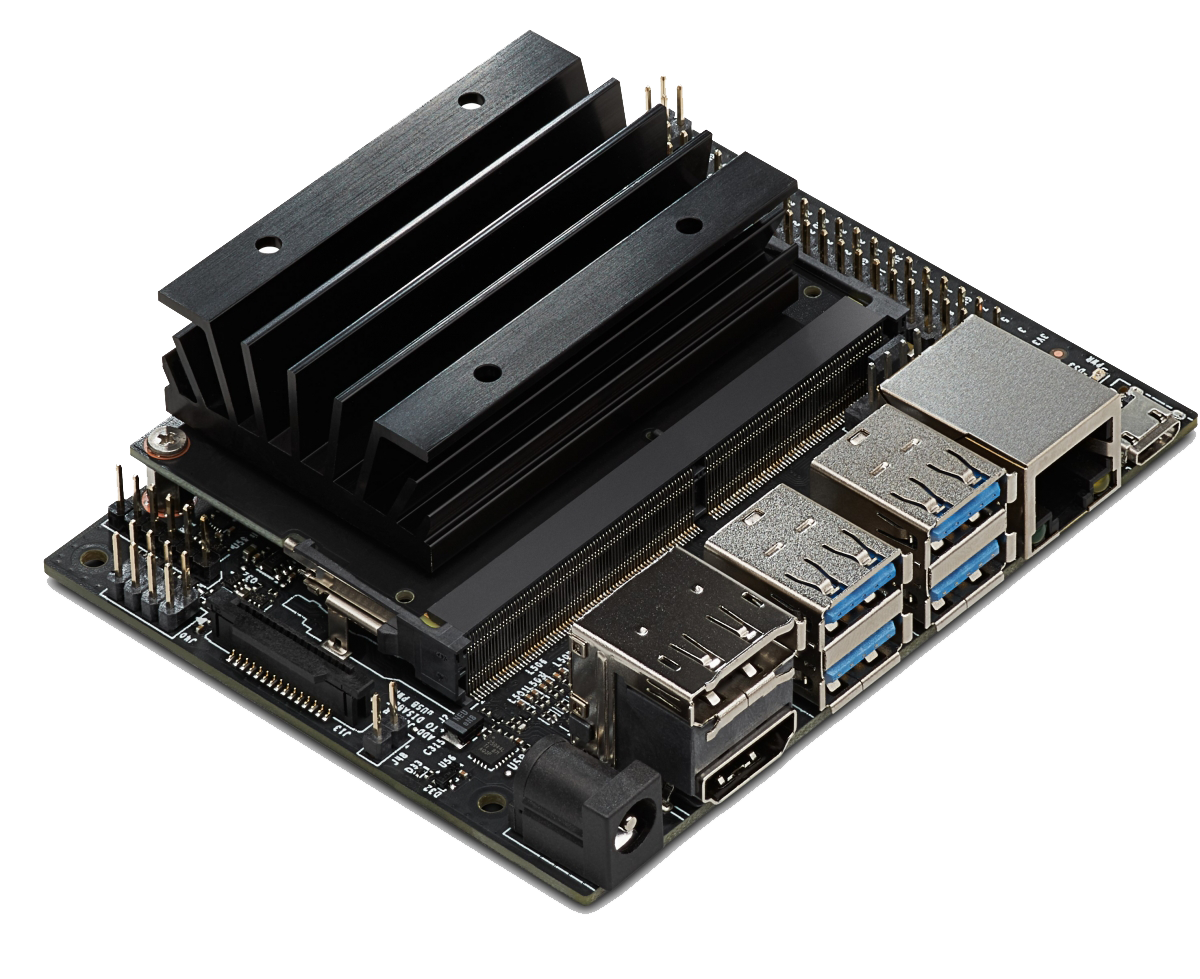
Fig. 14 NVIDIA Jetson Nano SBC#
To relay its eventual steering decisions to the flight controller (and thus the motors) we connected the Jetson Nano to the Pixhawk through serial (Pixhawk TELEM 1 <-> Jetson Nano UART_2). Also see this guide by MathWorks.
Power#
It is possible to power all components though a single LiPo battery but due to time constraints we used three separate batteries:
A 14.8V LiPo battery for the Jetson Nano
Two generic 3.6V 18650 batteries in series
A generic USB battery bank
The Jetson Nano is powered by the LiPo battery through a simple adjustable buck converter to step the battery’s 14.8V down to 5V.
The motors are powered directly by the two 18650 batteries. The motors are rated for a max voltage of 9V and thus don’t run at full speed off of the 7V battery output. This isn’t a problem.
The Pixhawk is simply powered through its USB-micro connection.